Mastering Your First Telescope in 2026: A Beginner’s Guide
You just bought your first telescope. Now what? We have watched hundreds of new astronomers struggle with their first setup, blurry images, objects drifting out of view, and frustration that leads to the scope collecting dust in a closet.
This guide fixes that. We will walk you through every step of using your first telescope, from unboxing to observing your first galaxy. No jargon, no assumptions, just clear instructions based on what we have taught at star parties and astronomy club events.
We have helped over 200 beginners set up their first telescopes at public observing sessions. The problems are always the same: blurry images from poor focus, shaky views from touching the scope, and confusion about finding objects. All of these are easy to fix once you know the basics.
Understanding Your Telescope
Every telescope has three core parts, regardless of type. Understanding these parts helps you troubleshoot problems and get better views.
The Optical Tube
This is the main body of the telescope. It contains the lens or mirror that gathers light. The aperture, the diameter of this lens or mirror, determines how much light the scope collects and how much detail you can see.
A 70mm refractor gathers enough light to show the Moon’s craters clearly. A 130mm reflector gathers nearly four times more light, revealing star clusters and brighter nebulae. Larger apertures show fainter objects and finer details.
The Mount
The mount holds the optical tube and lets you point it at objects. Two types are common on beginner telescopes.
Altazimuth mounts move up-down and left-right. They are simple, point the scope where you want to look. Most beginner refractors come on altazimuth mounts.
equatorial mounts align with Earth’s axis of rotation. They track objects as they move across the sky using a single slow-motion control. They take more setup but are better for high magnification and astrophotography.
The Eyepiece
The eyepiece magnifies the image formed by the telescope. Eyepieces have focal lengths measured in millimeters. A shorter focal length means higher magnification.
To calculate magnification, divide the telescope’s focal length by the eyepiece focal length. A 700mm focal length telescope with a 25mm eyepiece gives 28x magnification (700 ÷ 25 = 28).
Most beginner telescopes ship with two eyepieces: a low-power one (25mm) for wide views and a high-power one (10mm) for close-up views. Start with the low-power eyepiece every time.
Setting Up Your Telescope
Step 1: Choose Your Location
Pick a spot with a clear view of the sky. Avoid areas near streetlights, porch lights, or bright windows. Your eyes need about 20 minutes to adjust to the dark, light pollution from nearby sources resets this process.
A flat, stable surface works best. Grass is better than concrete because it absorbs vibration. If you must use concrete, place a rubber mat under the tripod legs.
Step 2: Assemble During Daylight
Set up your telescope during the day for the first time. Practice finding and focusing on distant objects like trees, buildings, or radio towers. Learning the controls in daylight is much easier than fumbling in the dark.
Most beginner telescopes assemble in 5 to 15 minutes. Attach the mount to the tripod, then place the optical tube on the mount. Insert the low-power eyepiece into the focuser.
Step 3: Align the Finder Scope
The finder scope, the small telescope mounted on top of the main tube, helps you aim at objects. It shows a wider field of view than the main telescope, making it easier to find targets.
During daylight, point the main telescope at a distant object like a tree or building. Look through the finder scope and adjust its screws until the crosshair sits exactly on the same object. Now when you aim the finder at a target, the main telescope will be pointing at it too.
Step 4: Focus on a Bright Object
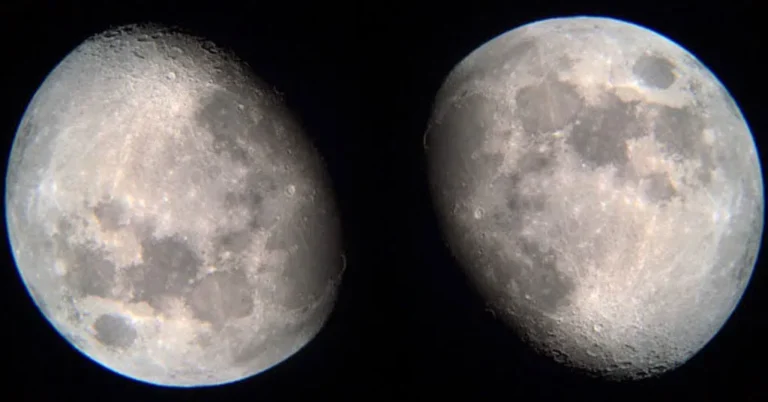
At night, start with the Moon, it is the easiest target to find and focus on. Point the telescope at the Moon using the finder scope. Look through the eyepiece and turn the focus knob slowly until the image sharpens.
If you see nothing but black, the telescope is not pointed at the object. Look through the finder scope again and adjust. If the image is very blurry, you may be looking at the inside of the focuser, pull the eyepiece out slightly and try again.
Understanding What You See
Why Images Appear Upside Down
Telescopes flip images. This is normal and does not mean anything is wrong. Refractors typically show images upside down. Reflectors show them upside down and reversed left-to-right. This has no effect on your ability to observe, space does not have a “right side up.”
If you need correctly oriented images (for terrestrial viewing or star-hopping with a chart), a star diagonal or erect-image prism corrects the orientation.
Why Objects Drift Across the View
Earth rotates. Objects appear to move from east to west across the sky at about 15 degrees per hour. At low magnification, this drift is slow, objects stay in the field of view for several minutes.
At high magnification, objects drift across the view in seconds. You must nudge the telescope to follow them. This is normal for manual telescopes. GoTo or tracking mounts compensate for this automatically.
Why Bright Objects Have Color Fringing
Achromatic refractors, the most common type on beginner telescopes, show purple halos around bright objects like Jupiter or Venus. This is called chromatic aberration. It happens because the lens does not focus all colors of light at the same point.
This is a limitation of the lens design, not a defect. Apochromatic refractors and reflectors eliminate this issue, but they cost more. For most observations, the color fringing is minor and does not affect your enjoyment.
Tips for Better Observations
Use Low Magnification First
Always start with the lowest magnification eyepiece (the one with the highest number, like 25mm). Find and center your target, then switch to a higher magnification eyepiece for more detail.
Low magnification shows a wider field of view, making it easier to find objects. It also produces brighter, sharper images with less atmospheric distortion.
Avoid Touching the Telescope
Touching the telescope causes vibrations that blur the image. Use the slow-motion controls or push gently on the tube body, never on the eyepiece or focuser.
After each adjustment, wait 3 to 5 seconds for vibrations to settle before looking through the eyepiece. This patience pays off with much sharper views.
Let the Telescope Cool Down
A telescope stored indoors is warmer than the outside air. Temperature differences cause air currents inside the tube that blur images. Let your telescope sit outside for 20 to 30 minutes before observing to reach thermal equilibrium.
Schmidt-Cassegrain and Maksutov telescopes take longer to cool down than refractors or reflectors because of their closed tube designs. A fan on the primary mirror speeds up the process.
Observe from Darker Locations
Light pollution washes out faint objects. The Moon, planets, and bright star clusters are visible from anywhere. But galaxies, nebulae, and faint star clusters need darker skies.
Use a light pollution map like lightpollutionmap.info to find darker sites near you. Even driving 20 minutes away from city lights can make a huge difference for deep-sky observing.
Keep an Observing Log
Write down what you observe each night, the date, time, location, target, telescope, eyepiece, and what you saw. This log helps you track your progress and remember which setups work best for different objects.
A simple notebook works fine. Some observers prefer apps like AstroPlanner or SkySafari’s logging feature. The habit of recording observations makes you a better observer over time.
Troubleshooting Common Problems
Image Is Blurry
Check these things in order: Is the focuser turned to the sharpest point? Is the telescope cooled to ambient temperature? Is the finder scope aligned with the main telescope? Is the eyepiece clean? Is the mirror collimated (for reflectors)?
Most blurry images come from poor focus or thermal issues. Turn the focus knob slowly past the sharpest point and back, find the middle of the range where the image looks best.
Cannot Find Any Objects
Start with the Moon, it is hard to miss. Once you can find and focus on the Moon, try Jupiter or Saturn (bright “stars” that do not twinkle). Then move to the Orion Nebula or the Pleiades star cluster.
Use a star chart app on your phone. Apps like Stellarium and Star Walk show you exactly what is visible from your location and help you star-hop from bright objects to fainter ones.
Mount Is Shaky
Tighten all bolts and knobs on the mount and tripod. Extend the tripod legs to the shortest comfortable height, shorter tripods are more stable. Hang a weight bag from the center column if your tripod has a hook.
Avoid touching the telescope during observation. Use the slow-motion controls for adjustments. If the mount is still shaky, consider a vibration suppression pad set under the tripod legs.
Finder Scope Does Not Match Main Telescope
Realign the finder scope during daylight on a distant object. Point the main telescope at the object, then adjust the finder’s screws until the crosshair sits on the same object. Check alignment at the start of each observing session.
Caring for Your Telescope
Storage
Keep your telescope in a dry place with dust caps on both ends of the tube. Humidity damages optical coatings over time. If you store it in a garage or shed, bring it inside 30 minutes before observing to let the mirror reach ambient temperature.
Cleaning Optics
Do not clean your lenses or mirrors unless they are visibly dirty. Dust has almost no effect on image quality. Fingerprints and water spots do affect quality and should be cleaned carefully.
Use a soft brush or compressed air to remove loose particles. For stubborn dirt, use lens cleaning solution and lens tissue, never paper towels or your shirt. Wipe gently in a circular motion from the center outward.
Collimation
Reflectors need periodic collimation, aligning the mirrors so they point at each other correctly. This takes about 5 minutes with a laser collimator. Check collimation at the start of each observing session.
Refractors and compound telescopes rarely need collimation. If your images look consistently bad despite proper focusing and cooling, collimation may be the issue.
For more beginner tips, see the High Point Scientific beginner guide and Astronomical League resources.
Continue learning: best telescope for kids, tabletop telescopes, telescopes under $200, telescope filters, and can telescope see planets, and telescope for a 5-year-old.
Frequently Asked Questions
How long does it take to learn to use a telescope?
Most people learn the basics in one or two observing sessions. Finding objects, focusing, and changing eyepieces become natural within a few weeks of regular use.
Why does my telescope show everything upside down?
Telescopes flip images, this is normal optical behavior. It does not affect astronomical observing because space has no “right side up.” A star diagonal can correct the orientation if needed.
What should I look at first with my new telescope?
Start with the Moon. It is bright, large, and easy to find. Once you can focus on the Moon, try Jupiter or Saturn. Then move to the Orion Nebula or the Pleiades star cluster.
How do I find objects in the sky?
Use a star chart app like Stellarium or Star Walk. Start with bright objects you can see with your eyes, then use the finder scope to aim the telescope. Star-hopping, moving from one known object to another, is the most reliable method.
Why are my images blurry?
The most common causes are poor focus, thermal issues (telescope not cooled to ambient temperature), and misaligned finder scope. Turn the focus knob slowly to find the sharpest point. Let the telescope sit outside for 20-30 minutes before observing.
Can I use my telescope during the day?
Yes, but never point it at the Sun without a proper solar filter. Permanent eye damage can occur in seconds. Daytime use works well for practicing setup and focusing on distant objects.
How do I avoid shaking the telescope?
Use the slow-motion controls instead of touching the tube. Wait 3-5 seconds after each adjustment for vibrations to settle. Keep the tripod at the shortest comfortable height for maximum stability.
What eyepiece should I use first?
Always start with the lowest magnification eyepiece, the one with the highest focal length number (usually 25mm). It shows a wider field of view, making it easier to find and center objects.
Do I need to collimate my telescope?
Reflectors need periodic collimation. Refractors and compound telescopes rarely need it. Check collimation at the start of each session if you have a reflector.
Where can I find other people interested in astronomy?
Join a local astronomy club, Astronomical League maintains a directory of clubs across the US. Online communities like Cloudy Nights and the r/telescopes subreddit are also active and welcoming to beginners.
Last updated: September 2026.
Mastering Your First Telescope: The First-Night Checklist
Assemble in daylight, align the finder on a distant chimney or treetop, then start with the Moon – it’s bright, easy, and forgiving. Resist the urge to max out magnification on night one. Still shopping? See the best telescopes for beginners, learn how telescopes work, and bookmark how to collimate a reflector for when views turn soft.

Written by Ryan Cole
Ryan Cole is Telescope Trove's how-to column. Behind the byline, our four-person editorial team breaks down astrophotography, mounts, and how telescopes work into plain-English guides for beginners.
Telescope Trove – The Wikipedia of Telescopes · More from Ryan Cole