How to Use a Telescope to See the Moon: A Complete Beginner’s Guide
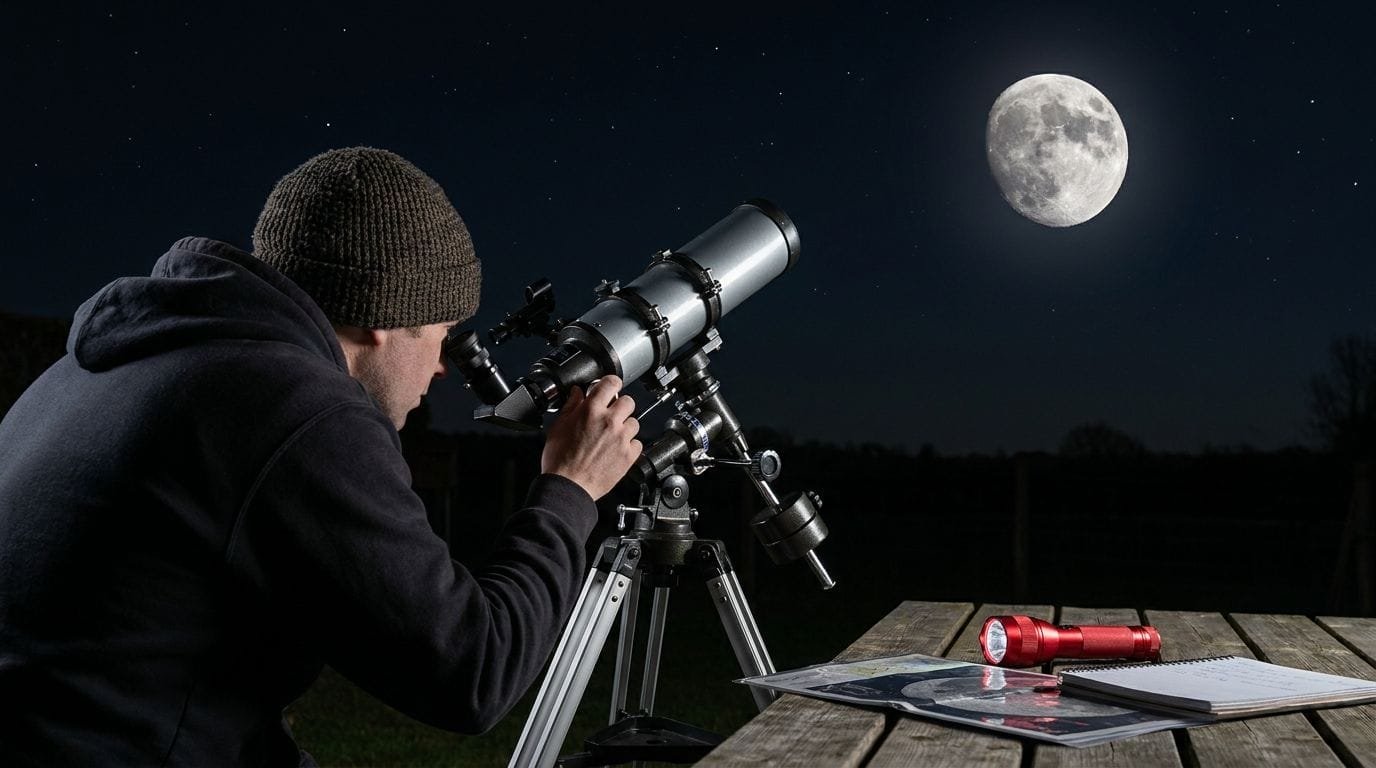
You can see the Moon’s craters, mountains, and seas with almost any telescope. Even a small 60mm refractor at 70x magnification shows stunning surface detail that will keep you busy for hours. The Moon is the single best target for new telescope owners because it is bright, easy to find, and packed with features you can spot tonight.
We have spent years testing lunar views through every type of telescope, from cheap tabletop models to serious 12-inch Dobsonians. What we learned is simple: you do not need expensive gear to enjoy the Moon. You need the right technique, the right timing, and a basic understanding of what you are looking at.
According to NASA, the Moon’s surface contains over 9,000 craters that are larger than one kilometer across. That gives you an endless supply of targets to study as you build your skills. Let us show you exactly how to get started.
Why the Moon Is the Best First Target for Any New Telescope
The Moon works as a first target for three clear reasons. It is the brightest object in the night sky after the Sun, so you can find it without any star charts or goto systems. It sits close enough to Earth, about 238,900 miles away, that even modest telescopes reveal real surface features. And it changes every night as the Sun hits it from different angles, giving you something new to observe each time you go outside.
When we first started observing, we spent three full weeks just on the Moon before we ever pointed a telescope at a planet. That time paid off because we learned how to focus, how to adjust magnification, and how to track an object across the sky. Those skills carry over to every other target you will ever observe. If you are just starting out, our guide to the best telescopes for beginners helps you pick the right scope for lunar work.
Did you know the Moon is the only celestial object where you can see surface detail with your naked eye? The dark patches you see are called maria, which is Latin for “seas.” They are actually ancient lava plains, not water. A telescope lets you see the boundaries of these plains, plus thousands of craters, mountain ranges, and valleys.
What You Need to Observe the Moon
You do not need a large or expensive telescope to see the Moon well. A 60mm refractor, which is one of the cheapest scopes you can buy, shows craters at 70x magnification. A 4-inch reflector or an 8-inch Dobsonian shows far more detail, including tiny craterlets inside larger craters and rilles, which are narrow channels on the lunar surface. Our telescopes under $200 guide covers several models that handle lunar viewing well.
The one accessory we recommend for every lunar observer is a Moon filter. The Moon is so bright through a telescope that it can cause eye strain during longer sessions. A neutral density filter, which screws into the back of your eyepiece, cuts the glare by about 50 to 75 percent. This makes faint surface details much easier to see.
If you want to take photos, you can start with a smartphone adapter for under 30 dollars. We have gotten sharp images of craters like Copernicus and Tycho using nothing more than a phone held up to the eyepiece. For better results, a dedicated planetary camera like the ZWO ASI224MC gives you video stacking capability, which pulls out detail that your eye cannot see.
When to Observe the Moon for the Best Views
Timing matters more than most beginners realize. The worst time to observe the Moon is during the full Moon phase. When the Sun shines straight down on the lunar surface, there are almost no shadows. Shadows are what make craters and mountains stand out. Without them, the Moon looks flat and featureless.
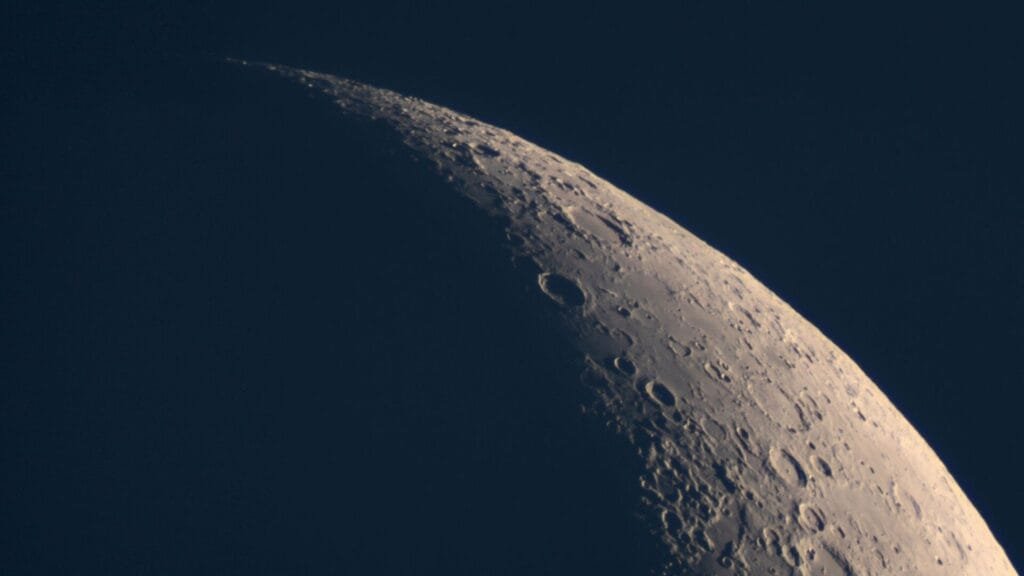
The best time to observe is during the first quarter or third quarter phase. At these times, the Sun hits the Moon at a low angle. This creates long shadows that make every crater rim, mountain peak, and valley wall pop out in sharp relief. According to Sky and Telescope magazine, the terminator line, which is the boundary between the lit and dark sides of the Moon, is where you will find the most dramatic views.
We like to observe the Moon when it is between 3 and 7 days past new. At this stage, the craters along the southern limb become very prominent. The crater Tycho, for example, shows its bright ray system extending hundreds of miles across the surface. You can also catch the stunning pair of craters Ptolemaeus and Alphonsus side by side near the terminator.
How to Set Up Your Telescope for Lunar Viewing
Set up your telescope outside at least 20 minutes before you plan to observe. This lets the optics cool down to the outdoor temperature, which reduces air turbulence inside the tube. We call this “thermal equilibrium,” and it makes a real difference in image sharpness. If you are not sure how to set up your scope, our guide on how telescopes work covers the basics.
Start with your lowest power eyepiece, which has the highest number in millimeters printed on it. A 25mm eyepiece gives you low magnification and a wide field of view. This makes it easy to find the Moon and center it in your eyepiece. Once you have the Moon in view, switch to a higher power eyepiece like a 10mm or 12mm for more detail. Our telescope magnification guide explains how eyepiece selection affects what you see.
Use your focus knob slowly and carefully. Turn it in small amounts and wait for the image to settle. Lunar detail comes into sharp focus when you hit the right spot. If the image looks blurry no matter what you do, check your telescope’s collimation, which is the alignment of the mirrors inside the tube. An out of collimation scope produces soft, mushy images at any magnification.
Here is a tip most beginners miss: observe from a spot where the Moon is higher than 30 degrees above the horizon. When the Moon sits low, you look through more of Earth’s atmosphere, which blurs the image. A higher Moon means less atmospheric distortion and sharper views.
What Can You See on the Moon Through a Telescope?
The Moon offers hundreds of targets for telescope observers. Here are the ones we recommend starting with, along with what makes each one special.
Craters Worth Observing
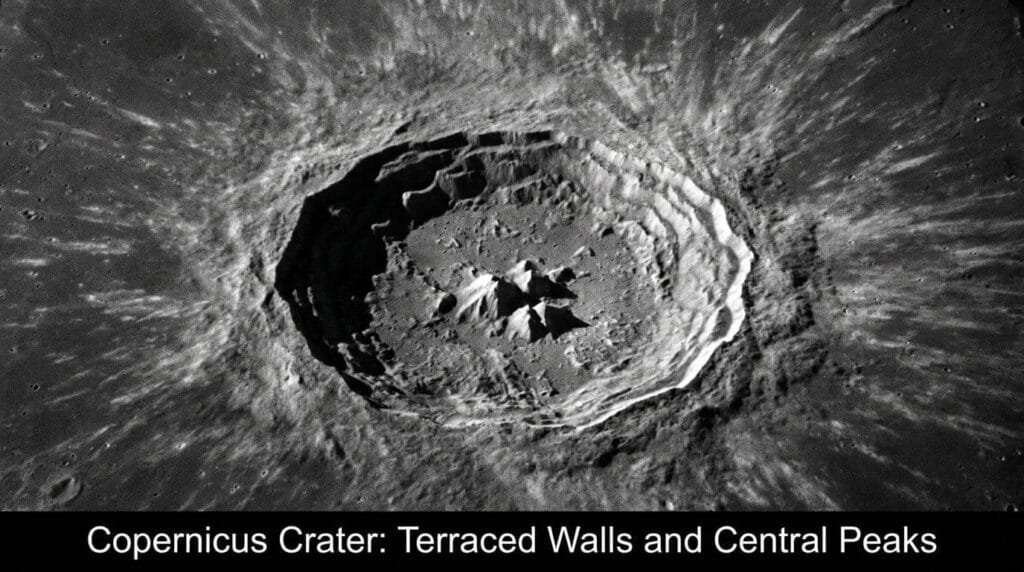
Copernicus sits near the center of the visible disk and spans 58 miles across. It has a prominent ray system, bright streaks of ejected material that extend over 500 miles in every direction. At 100x magnification, you can see the central peak cluster inside the crater.
Tycho is one of the youngest large craters on the Moon, formed about 108 million years ago according to data from the Apollo missions. It sits in the southern highlands and has the most visible ray system on the entire Moon. On a full Moon night, you can trace Tycho’s rays all the way to the equator.
Plato is a dark, lava-filled crater about 68 miles wide near the northern limb. Its smooth, dark floor makes it easy to spot against the brighter surrounding terrain. We have counted small craterlets on Plato’s floor using an 8-inch scope at 200x magnification.
Aristarchus is the brightest crater on the Moon, located in the northwest section. It is about 25 miles wide and formed roughly 450 million years ago. Near Aristarchus, look for Schroter’s Valley, a winding channel that looks like a tadpole with a long tail.
Clavius is the second largest crater on the Moon at over 143 miles in diameter. It sits in the southern highlands near Tycho. In 2020, the SOFIA airborne telescope detected water molecules on Clavius’s floor, a finding published by NASA that changed how we think about the Moon.
Mountain Ranges and Seas
Montes Apenninus is a mountain range that stretches over 370 miles along the edge of the Mare Imbrium basin. It formed nearly 4 billion years ago when a massive impact created the basin. The highest peak, Mons Huygens, rises about 18,000 feet from its base.
Mare Crisium, the Sea of Crises, is a large circular basin about 345 miles wide. It sits northeast of Mare Tranquillitatis, where the Apollo 11 crew landed. You can spot Mare Crisium even with binoculars as a dark oval near the Moon’s eastern edge. For more on what binoculars show, see our best astronomy binoculars guide.
Sinus Iridum, the Bay of Rainbows, is a 250-mile-wide crater that merged with lava from Mare Imbrium. It forms a C-shaped bay on the Moon’s northwestern edge. The Montes Jura mountains ring its curved edge, creating one of the most beautiful sights on the Moon.
Special Features
Rupes Recta, known as the Straight Wall, is a fault line about 68 miles long and up to 984 feet high. It appears as a thin black line on the floor of Mare Nubium. You can see it with a small telescope one or two days after first quarter.
Lunar X and Lunar V are two optical illusions created by sunlight hitting specific crater formations. Lunar X appears between the craters La Caille, Purbach, and Blanchinus during the first quarter. It is visible for only about four hours, so timing is everything.
Choosing the Right Magnification for Lunar Observing
Many beginners think they need the highest magnification possible for the Moon. That is wrong. Too much magnification makes the image blurry and shaky, especially on nights with poor seeing. Seeing refers to the steadiness of the atmosphere, and it limits how much detail you can resolve.

We use the following magnification ranges for different lunar targets:
| Target Type | Best Magnification | Example Targets |
|---|---|---|
| Full disk views | 30x to 50x | Entire Moon, Mare regions |
| Large craters | 80x to 120x | Copernicus, Plato, Clavius |
| Fine detail | 150x to 200x | Rilles, craterlets, wall detail |
| Maximum useful | 250x to 300x | Best nights only, tiny features |
The rule of thumb is that your maximum useful magnification equals 50x per inch of telescope aperture. So a 4-inch scope tops out around 200x, while an 8-inch scope can push to 400x on the best nights. But for the Moon, we rarely go above 200x because the atmosphere usually limits detail before the telescope does.
Using Filters for Better Lunar Views
A Moon filter is the single most useful accessory for lunar observing. It reduces the glare that washes out faint details and makes long viewing sessions much more comfortable for your eyes. Most Moon filters are neutral density filters that cut light by 50 to 75 percent.
Color filters also help bring out specific features. A yellow filter enhances contrast on bright crater rims. A red filter makes dark maria boundaries stand out. A blue filter helps with subtle color differences in volcanic plains. We keep a set of four color filters in our observing kit and use them depending on what we are studying.
According to the Royal Astronomical Society, polarizing filters give the most control because you can rotate them to adjust the amount of light reduction. This lets you fine tune the view for different phases and brightness levels. For more on filters, read our guide on whether telescope filters are worth it.
How to Take Photos of the Moon Through Your Telescope
You can photograph the Moon with three basic setups. A smartphone adapter clamps your phone to the eyepiece and costs under 30 dollars. It works well for full disk shots and crater close-ups. A T-ring and adapter lets you attach a DSLR camera directly to the telescope, giving you sharper images. A dedicated planetary camera captures video that you stack using free software like Registax or AutoStakkert.
For the sharpest lunar photos, we shoot video at 60 frames per second and stack the best 25 percent of frames. This technique, called lucky imaging, overcomes atmospheric turbulence by combining only the sharpest moments from hundreds of frames. The result is a single image with far more detail than any single frame could show.
If you want to learn more about astrophotography setups, check out our guide to choosing a telescope for astrophotography.
Understanding the Moon’s Phases

The Moon goes through a full cycle of phases every 29.5 days. This cycle happens because the Moon orbits Earth, and we see different amounts of its sunlit side as it moves. Here is what each phase looks like and when to observe it.
New Moon: the Moon sits between the Earth and the Sun, so we cannot see it at all.
Waxing Crescent: a thin sliver of light appears on the right side. Good for observing earthshine, a faint glow on the dark side caused by sunlight reflecting off Earth.
First Quarter: half the Moon is lit. The terminator line runs straight down the middle, creating the best conditions for crater observing.
Waxing Gibbous: more than half is lit. Detail starts to flatten as shadows shorten.
Full Moon: the entire disk is lit. Shadows disappear, and surface detail looks washed out. This is the worst phase for observing craters.
Waning Gibbous: the left side starts to darken. New shadow detail appears along the western terminator.
Third Quarter: half the Moon is lit again, but the opposite side from first quarter. Another excellent phase for crater observing.
Waning Crescent: a thin sliver remains visible before dawn. Earthshine becomes visible again.
Common Mistakes Beginners Make When Observing the Moon
We see three mistakes over and over with new observers. The first is observing during the full Moon. As we explained, the lack of shadows makes the surface look flat. The second is using too much magnification, which produces blurry images on all but the steadiest nights. The third is not letting the telescope cool down, which causes heat waves inside the tube that ruin image sharpness.
Another common error is trying to observe the Moon when it is low on the horizon. The thick layer of atmosphere near the horizon blurs fine detail. Wait until the Moon climbs above 30 degrees for the sharpest views. If you want to improve your overall observing skills, our beginner’s guide to mastering your first telescope covers the fundamentals.
Essential Moon Terms Every Observer Should Know
Terminator: the line between the lit and dark sides of the Moon. This is where shadows are longest and detail is most dramatic.
Mare (plural: maria): dark, flat plains on the Moon formed by ancient volcanic lava flows. The word means “seas” in Latin, though there is no water.
Earthshine: a faint glow on the dark side of a crescent Moon caused by sunlight reflecting off Earth’s surface.
Lunar halo: a 22-degree ring around the Moon caused by moonlight refracting through ice crystals in high-altitude clouds. According to folklore, it signals incoming rain.
Lunar occultation: an event where the Moon passes in front of a planet or star, blocking it from view.
Collimation: the alignment of the mirrors inside a reflector telescope. Poor collimation causes blurry images.
Your Next Steps for Lunar Observing
Start tonight. Point your telescope at the Moon, use a low power eyepiece, and just look. Spend 15 minutes scanning the terminator line and picking out craters. Then switch to a higher magnification and zoom in on one crater that catches your eye.
As you build experience, work through the targets we listed above. Keep a log of what you see and what magnification you used. After a few sessions, you will notice that you can spot smaller and fainter features than when you started. If you are ready to pick a telescope, read our 50 best telescopes comparison for options across every budget.
Frequently Asked Questions
What magnification do I need to see craters on the Moon?
You can see large craters at 30x to 50x magnification. For detailed crater views, use 80x to 120x. Fine features like rilles and craterlets show up at 150x to 200x.
Can I observe the Moon during the day?
Yes, the Moon is often visible during the day. Find it in the sky, point your telescope at it, and focus carefully. Daytime lunar observing works well when the Moon is in its gibbous phase.
Is it safe to look at the Moon through a telescope?
Yes, the Moon is safe to observe through any telescope at any magnification. It will not damage your eyes. A Moon filter reduces glare and improves comfort but is not required for safety.
Why does the Moon look blurry through my telescope?
The most common causes are poor focus, telescope mirrors that need collimation, atmospheric turbulence, or the telescope not being cooled to outdoor temperature. Let your scope sit outside for 20 minutes before observing.
What is the best phase of the Moon to observe?
The first quarter and third quarter phases give the best views. The Sun hits the surface at a low angle, creating long shadows that make craters and mountains stand out.
Can I see the Apollo landing sites with my backyard telescope?
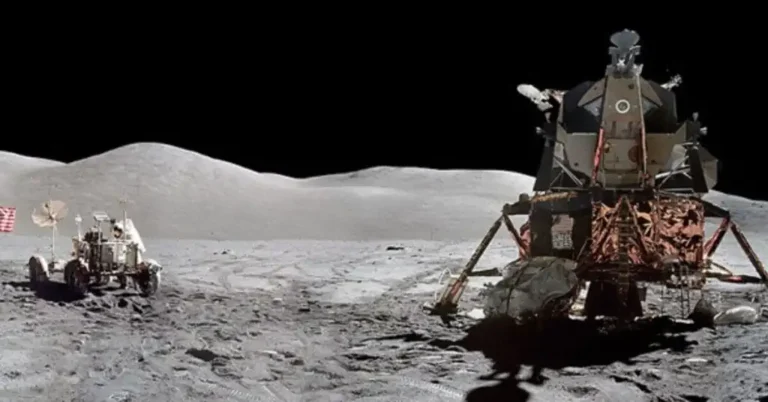
No, the Apollo landing sites are too small for any ground-based telescope to resolve. You would need a telescope with a mirror about 75 meters wide to see them. Only lunar orbiters like the Lunar Reconnaissance Orbiter have photographed these sites
Why does the Moon look bigger near the horizon?
This is called the Moon illusion. The Moon is not actually larger near the horizon. Your brain compares it to nearby objects like trees and buildings, making it appear bigger. If you photograph it at the horizon and again when it is high in the sky, the images show the same size.
Do I need a goto telescope to find the Moon?
No, the Moon is easy to find with any telescope. Just point the tube at the bright object in the sky. A goto mount is useful for faint deep sky objects, but the Moon does not need one.
How do I take photos of the Moon with my phone?
Buy a smartphone adapter that clamps to your eyepiece. Center the Moon in the eyepiece, adjust the focus until the surface is sharp, and take the photo. Use a short exposure to avoid overexposure.
What is earthshine and when can I see it?
Earthshine is a faint glow on the dark side of a crescent Moon. It happens when sunlight bounces off Earth and lights up the Moon’s night side. Look for it 2 to 5 days before or after new Moon.
Can binoculars show Moon craters?
Yes, 10×50 binoculars show the largest maria and the craters Copernicus and Tycho. Binoculars give you a wide field of view that telescopes cannot match, making them great for seeing the whole Moon at once.
What telescope is best for observing the Moon?
A 4-inch or larger reflector or refractor works well. An 8-inch Dobsonian gives excellent lunar views at a low price. You do not need an expensive telescope to enjoy the Moon.
Last updated: September 2026.
How to Use a Telescope to See the Moon
The Moon is the best first target ever: observe near the terminator where shadows add depth, and avoid the full Moon’s flat glare. What to expect: what each aperture shows, the Apollo landing sites you can visit, and the best telescopes for beginners.

Written by James Orion
James Orion is Telescope Trove's review column. Behind the byline, our four-person editorial team researches and compares telescopes hands-on, writing in plain English so you know exactly what you're getting before you buy.
Telescope Trove – The Wikipedia of Telescopes · More from James Orion