Astrophotography Tips: A Beginner’s Guide to Night Sky Photography
Astrophotography Tips: How to Capture Stunning Night Sky Photos
Astrophotography lets you record the beauty of the night sky in ways your eyes alone cannot see. A camera with a long exposure reveals colors, structures, and faint objects invisible to visual observation. We compiled the best astrophotography tips from years of trial and error under dark skies.
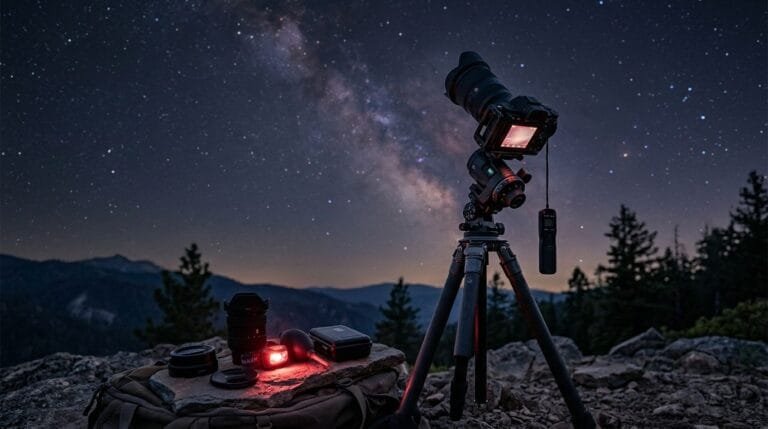
Following these astrophotography tips will improve your results from the very first session. A DSLR camera, a sturdy tripod, and a dark location are enough to photograph the Milky Way. Add a tracking mount and a telescope, and you can capture galaxies and nebulae in breathtaking detail.
Start with What You Have
Do you own a DSLR or mirrorless camera? That is all you need for your first astrophotography session. Set the camera to manual mode, point it at the Milky Way, and take a 20-second exposure at ISO 3200. The results will amaze you.
Any camera with manual exposure control works for night sky photography. Even some advanced compact cameras can photograph star fields. The key settings are aperture (as wide as possible), ISO (1600-6400), and shutter speed (15-30 seconds).
A sturdy tripod is essential because the camera must remain perfectly still during the exposure. A cheap, flimsy tripod will shake in the wind and ruin your photos. Invest in a solid tripod with a fluid head – it will serve you for years. Read our best tripod for telescope guide for recommendations.
The 500 Rule for Sharp Stars
How long can you expose before stars start to trail? The 500 Rule gives you a quick answer. Divide 500 by your lens focal length to get the maximum exposure time in seconds. For a 24mm lens, 500 ÷ 24 = 20 seconds maximum.
This rule works well for full-frame cameras. For crop-sensor cameras, divide by the crop factor first. A 24mm lens on a 1.5x crop sensor behaves like a 36mm lens. So 500 ÷ 36 = 13 seconds maximum exposure.
The 500 Rule is a starting point, not an absolute law. Modern high-resolution sensors may show trailing at shorter exposures. The best approach is to test your specific setup and adjust accordingly. Take a test shot, zoom in on the stars, and check for elongation.
For longer exposures without trailing, you need a tracking mount. A star tracker like the Sky-Watcher Star Adventurer follows the stars’ apparent motion. This lets you expose for 2-5 minutes with pinpoint stars. See our best GoTo mount for astrophotography guide for tracking options.
Focus is Everything
Out-of-focus stars look like blobs instead of tiny points. Achieving sharp focus at night is one of the biggest challenges in astrophotography. The autofocus system on most cameras does not work in the dark.
Switch your lens to manual focus and use Live View to zoom in on a bright star. Adjust the focus ring until the star appears as small as possible. Some cameras have a focus peaking feature that highlights sharp edges in red or yellow.
A Bahtinov mask is a focusing aid that fits over the front of your lens or telescope. It creates a distinctive diffraction pattern around bright stars. When the pattern is symmetrical, you know the focus is perfect. Bahtinov masks cost $10-30 and are worth every penny.
Check your focus every 30-60 minutes during a session. Temperature changes cause the lens to expand or contract, which shifts the focus point. Refocusing mid-session takes only a minute and prevents blurry photos. The Sky & Telescope website has detailed tutorials on night-sky focusing techniques.
Choose the Right Location
Light pollution is the biggest obstacle to good astrophotography. City lights wash out faint stars and nebulosity. Even a 30-minute drive to a darker location makes a huge difference in image quality.
Use lightpollutionmap.info to find dark sky sites near your location. Bortle 4 or darker skies are ideal for deep-sky astrophotography. Bortle 5-6 suburban skies still produce good results for the Moon, planets, and bright nebulae.
Elevation matters too. Higher locations have less atmospheric moisture and turbulence. Many of the world’s best observatories are on mountaintops for this reason. You do not need a mountaintop, but a hilltop away from valleys and cities helps.
Arrive at your dark site before sunset to set up in daylight. Finding the right spot, leveling your tripod, and polar aligning your mount are all much easier with light. Once darkness falls, you are ready to start imaging immediately.
Stack Your Exposures
Why do professional astrophotos look so clean and detailed? The secret is stacking. Instead of taking one long exposure, you take many shorter ones and combine them using software. This reduces noise and increases the signal-to-noise ratio.
For deep-sky imaging, take 20-50 exposures of the same target. Each exposure might be 2-5 minutes long. Software like DeepSkyStacker (free) or PixInsight aligns and combines them into a single image. The result has far less noise than any single frame.
Stacking also corrects for satellite trails, airplane lights, and other artifacts. The software rejects outlier pixels that appear in only one frame. This produces a clean image even if a few individual frames have problems.
Calibration frames improve stacking quality further. Dark frames record the camera’s thermal noise. Flat frames correct for uneven illumination across the sensor. Bias frames record the camera’s read noise. Taking these frames adds 10-15 minutes to your session but makes a noticeable difference in the final image.
Post-Processing Tips
The raw stacked image usually looks dim and flat. Post-processing brings out the detail and color hidden in the data. The key is to work gently – over-processing creates ugly halos, noisy backgrounds, and unnatural colors.
Start by stretching the histogram. This brightens the faint nebulosity without blowing out bright stars. Use curves adjustments to boost contrast in the mid-tones. Reduce the background level to make the sky appear black.
Color calibration ensures that stars and nebulae look natural. Many astrophotography programs include automatic color calibration tools. Adjust the white balance until stars appear white (not blue or orange) in regions of the Milky Way that should be neutral.
Noise reduction should be applied carefully. Too much noise reduction blurs fine detail. Apply it mainly to the background sky, not to the stars or nebulosity. PixInsight, Photoshop, and Siril all have good noise reduction tools. For telescope recommendations, see our best telescopes for astrophotography guide.
Comparison Table: Astrophotography Methods
| Method | Equipment Needed | Exposure Time | Targets | Difficulty |
|---|---|---|---|---|
| Camera on Tripod | DSLR + tripod | 15-30 sec | Milky Way, constellations | Easy |
| Camera + Star Tracker | DSLR + tracker mount | 2-5 min | Wide nebulae, star clouds | Moderate |
| Lens on EQ Mount | Camera lens + EQ mount | 5-10 min | Bright nebulae, galaxies | Moderate |
| Telescope on EQ Mount | Scope + EQ mount + camera | 5-15 min | Deep-sky objects | Hard |
| Planetary Video | Scope + planetary camera | Video (ms frames) | Planets, Moon | Moderate |
Best Targets for Beginners
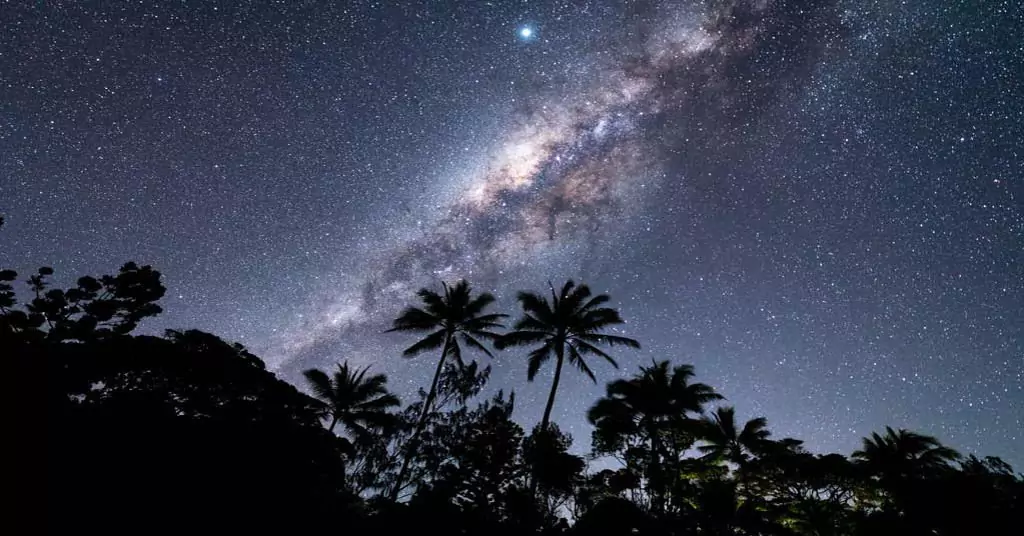
The Milky Way is the easiest and most rewarding target for new astrophotographers. In summer, it arches across the sky from Sagittarius to Cassiopeia. A 24mm lens at f/2.8, ISO 3200, and 20 seconds captures it beautifully.
The Orion Nebula (M42) is the best deep-sky target for winter imaging. It is bright enough to show detail in a single 30-second exposure. With stacking, you can reveal the nebula’s pink and blue colors and the Trapezium star cluster at its center.
The Andromeda Galaxy (M31) is visible from autumn through winter. It is the most distant object visible to the naked eye at 2.5 million light-years away. A 200mm lens shows its companion galaxies M32 and M110 alongside the main spiral.
The Moon is a fantastic target for any camera and lens combination. A 200-300mm telephoto lens captures detailed views of craters and maria. The best time to photograph the Moon is during its crescent or quarter phase, when the side lighting creates dramatic shadows. See our how can a telescope see the Moon guide for more tips.
Essential Astrophotography Tips for Cold Weather
These astrophotography tips for cold weather will keep you comfortable and your equipment working. This means imaging in cold temperatures, often below freezing. Cold drains camera batteries fast – bring at least three fully charged batteries for a long session.
Dew and frost form on lens surfaces when the temperature drops. A dew heater strip wrapped around the lens barrel prevents this. Without a heater, your lens may fog up after midnight and end your session early.
Dress in layers and wear insulated boots, gloves, and a hat. Chemical hand warmers inside your gloves keep your fingers functional for focusing and camera adjustments. A thermos of hot cocoa or coffee makes the wait between exposures much more pleasant.
Keep your camera sensor warm by using a hand warmer taped to the body. Cold sensors produce more noise in long exposures. Some dedicated astronomy cameras have built-in cooling systems, but DSLRs rely on ambient temperature. According to the American Astronomical Society, sensor noise doubles approximately every 6°C drop in temperature.
Common Mistakes and How to Avoid Them
These astrophotography tips will help you avoid frustration and get results faster. Higher ISO amplifies both signal and noise. For most DSLRs, ISO 1600-3200 gives the best balance. Going above ISO 6400 usually adds more noise than signal.
Another common error is not taking enough light frames. A single 5-minute exposure is noisier than ten 30-second exposures stacked together. More total exposure time always produces a cleaner image. Aim for at least 30 minutes of total exposure per target.
Forgetting to check focus is the third most common mistake. Stars that look sharp on a camera’s small LCD screen may be slightly out of focus when you view the image on a computer. Always zoom in to 100% on the LCD and check star shapes carefully.
Vibration from touching the camera ruins many exposures. Use a 2-second timer delay or a remote shutter release to avoid this. Even pressing the shutter button by hand introduces enough vibration to blur stars. A cable release or wireless remote costs $10-20 and eliminates this problem entirely.
Growing Your Skills Over Time
Astrophotography has a steep learning curve, but the rewards are worth the effort. Your first photos will show stars, the Milky Way, and maybe a bright nebula. With practice and better equipment, you will capture galaxies, faint nebulae, and planetary detail.
Join an online astrophotography community to share your work and learn from others. Cloudy Nights, Reddit’s r/astrophotography, and AstroBin are popular forums. Members share processing techniques, equipment reviews, and dark site locations.
Set realistic goals and celebrate small wins. Your first tracked image with round stars is a milestone. Your first image showing the Horsehead Nebula is another. Each step forward builds your skills and confidence. For equipment advice, browse our best affordable telescopes list.
The telescope you use matters. Our astrophotography telescope guide covers the best scopes for imaging.
For wide-field work, a good pair of astronomy binoculars helps you find targets before pointing your camera.
A sturdy tripod is the foundation of any astrophotography setup.
Frequently Asked Questions
Q: What is the best camera for astrophotography beginners?
A: Any DSLR or mirrorless camera with manual exposure control works well. The Canon EOS Ra and Nikon Z6 II are popular choices. Used Canon EOS 6D or Nikon D750 cameras offer great value for under $500.
Q: Do I need a telescope for astrophotography?
A: No. A camera lens on a tripod captures stunning Milky Way photos. A camera lens on a tracking mount captures nebulae and galaxies. A telescope is needed only for planetary and small deep-sky imaging.
Q: How much does a basic astrophotography setup cost?
A: A DSLR, tripod, and remote shutter cost $300-500 (using a used camera). Adding a star tracker costs another $300-500. A complete telescope-based setup runs $1,500-3,000.
Q: What is the best free software for processing astrophotos?
A: DeepSkyStacker is the best free stacking program for deep-sky images. Siril is a free alternative that also handles processing. GIMP is a free image editor that works well for final adjustments.
Q: Can I photograph the Milky Way from the city?
A: Light pollution washes out the Milky Way in cities. You need Bortle 5 or darker skies to photograph it clearly. Even a short drive to a rural area makes a big difference.
Q: How long should my total exposure time be?
A: More is always better. A minimum of 30 minutes total exposure produces acceptable results for bright targets. Faint nebulae and galaxies benefit from 2-4 hours of total exposure time.
Q: What is the best time of year for astrophotography?
A: Autumn and winter offer the longest, darkest nights and the best atmospheric seeing. Summer is great for Milky Way photography. Spring offers galaxy season when many distant galaxies are overhead.
Q: Can I use a smartphone for astrophotography?
A: Modern smartphones with night mode can photograph the Milky Way and star trails. They cannot match a DSLR for deep-sky work, but they are surprisingly capable for casual astrophotography.
Q: What is autoguiding and do I need it?
A: Autoguiding uses a second camera to monitor a guide star and send correction signals to your mount. It is essential for exposures longer than 2-3 minutes. For shorter exposures, careful polar alignment is sufficient.
Q: How do I prevent dew on my lens?
A: Use a dew heater strip wrapped around the lens barrel. A simple USB-powered heater costs $20-30. You can also use a dew shield (a cardboard tube extension) to slow moisture buildup.
Q: What is the difference between a light frame and a dark frame?
A: A light frame is your normal exposure of the sky. A dark frame is taken with the lens cap on at the same temperature and exposure time. Dark frames record the camera’s thermal noise so it can be subtracted during stacking.
Q: Should I shoot in RAW or JPEG format?
A: Always shoot in RAW format. RAW files contain much more data than JPEGs, which gives you more flexibility during processing. JPEG compression discards faint detail that is critical for astrophotography.
Last updated: September 2026.
Astrophotography Tips for Beginners
Start on a tripod with what you own, learn the 500 rule, and stack – stacking 30 short exposures beats one heroic long one. When you’re hooked, see astrophotography with a telescope, affordable astrophotography equipment, and taking pictures with a telescope.

Written by Ryan Cole
Ryan Cole is Telescope Trove’s astrophotography and how-to editor. He breaks down cameras, mounts and imaging techniques into plain-English guides, and explains how telescopes actually work – taking beginners from first light to first photo with confidence.
Telescope Trove – The Wikipedia of Telescopes · More articles by Ryan